
Ribbon hair bows are a versatile and popular accessory‚ adding elegance or playfulness to various hairstyles. They can be customized to suit different occasions and personal styles‚ making them a timeless favorite for both kids and adults. With tutorials and tools widely available‚ creating these bows has become an enjoyable DIY project for many. Whether for a subtle touch or a bold statement‚ ribbon hair bows continue to trend‚ offering endless creative possibilities.
Materials Needed for Ribbon Hair Bows
To create a ribbon hair bow‚ you’ll need high-quality ribbon in your preferred color and width‚ typically between 3.8 cm for standard bows. Additional materials include scissors‚ a hot glue gun‚ or needle and thread for securing the bow. A bow maker or template can simplify the process‚ while wooden dowels or Styrofoam balls help shape the loops. Optional accessories like hair clips‚ elastic bands‚ or alligator clips are needed for attachment. Wired ribbon is ideal for maintaining shape and durability.
Step-by-Step Instructions for Making a Ribbon Hair Bow
Begin by preparing the ribbon‚ then create uniform loops. Fold and shape the loops to form the bow. Secure the center tightly and attach to a hair clip or band.
Preparing the Ribbon
Start by selecting your ribbon and measuring the desired length. Cut the ribbon to size using sharp scissors. For a standard bow‚ cut two pieces: one longer for the loops and a shorter one for the center. Ensure the ribbon is smooth and free of wrinkles. If using wired ribbon‚ gently shape it to hold its form. For a polished look‚ trim the ends at a slight angle to prevent fraying. Set the pieces aside‚ ready for forming the loops in the next step.
Creating the Bow Loops
To form the bow loops‚ take the longer ribbon piece and create folded loops. Hold the ribbon vertically‚ make a loop on one side‚ then another on the opposite side. Ensure the loops are symmetrical and tightly held together. Secure the loops at the base using a small pin or clip. For wired ribbon‚ shape the loops gently to maintain their form. This step sets the foundation for the bow’s structure‚ so precision is key for a balanced look.
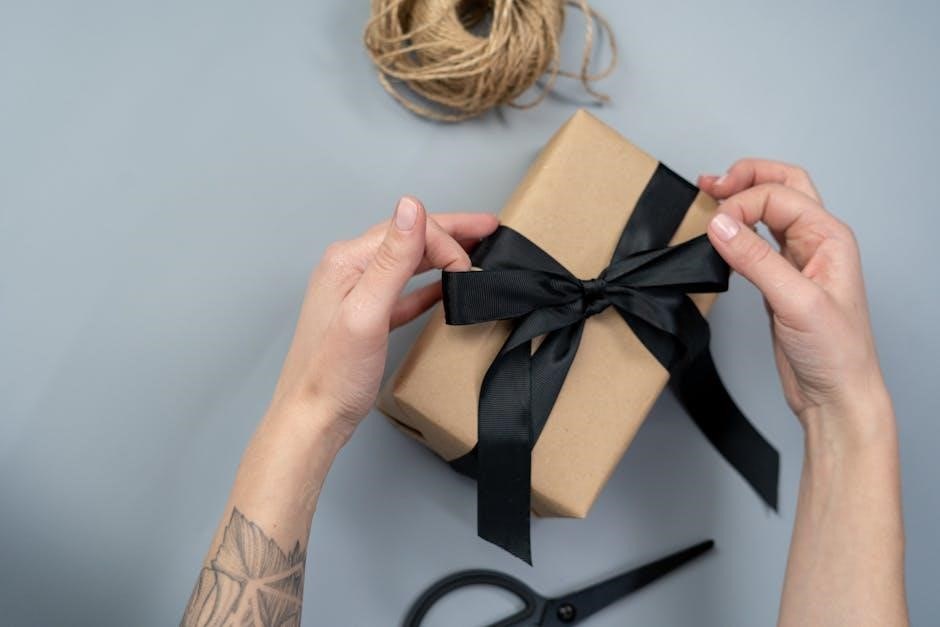
Securing the Bow
To securely fasten the bow‚ apply a small amount of hot glue to the base where the loops meet. Hold the loops firmly in place until the glue sets. For added stability‚ wrap the center with a thin ribbon or thread. Attach the bow to a hair clip or band using hot glue or needle and thread. Ensure the adhesive is fully dry before use. This step ensures the bow remains intact and securely attached to the hair‚ completing the accessory.
Styling Ideas for Ribbon Hair Bows
Ribbon hair bows offer endless styling possibilities. Opt for bold‚ contrasting colors to make a statement or match the bow to your outfit for a cohesive look. Pair oversized bows with sleek hairstyles for drama or use smaller bows for a subtle charm. Experiment with layering ribbons of different textures or patterns. Attach the bow to a hair clip for easy styling or incorporate it into a ponytail or braid. This versatile accessory suits casual outings‚ formal events‚ or school looks‚ making it a must-have for any wardrobe.
Tools and Accessories for Making Ribbon Hair Bows
To craft ribbon hair bows‚ essential tools include a bow maker‚ scissors‚ and a hot glue gun for securing the bow to hair clips or bands. Optional accessories like measuring tape‚ ribbon cutters‚ and dowels can enhance precision. Wired ribbons are recommended for maintaining shape. These tools simplify the process‚ ensuring durable and aesthetically pleasing results. Whether for casual or formal styles‚ the right tools make creating ribbon hair bows effortless and enjoyable.
Customizing Your Ribbon Hair Bow
Customizing ribbon hair bows allows for personal expression‚ with options like varying ribbon widths‚ colors‚ and patterns. Adding embellishments such as rhinestones or flowers enhances uniqueness. Seasonal themes can be incorporated using holiday-specific ribbons. Layering different textures or sizes creates depth. Whether matching an outfit or reflecting a personality‚ customization transforms a simple bow into a standout accessory‚ making each piece truly special and tailored to individual style preferences or occasions. This versatility ensures endless creative possibilities for any look.
Troubleshooting Common Issues
Common issues when making ribbon hair bows include uneven loops or loose threads. To fix uneven loops‚ ensure consistent tension while forming each loop. For loose threads‚ secure ends with hot glue or clear nail polish. If the bow lacks shape‚ use wired ribbon for better structure. Avoid fraying by sealing ribbon ends with heat or fray-checking spray. Properly aligning the center piece ensures a polished look‚ while tightening stitches prevents the bow from unraveling over time‚ ensuring durability and a professional finish.
Popular Trends in Ribbon Hair Bows
Current trends include small‚ delicate bows inspired by celebrities like Millie Bobby Brown‚ and the use of textured ribbons such as grosgrain‚ satin‚ and velvet. DIY enthusiasts embrace minimalist designs and vibrant colors‚ while others opt for custom embellishments like glitter and charms‚ making each bow unique and personalized.
Making ribbon hair bows is a fun and creative process that allows for endless personalization. With simple materials and step-by-step instructions‚ anyone can craft beautiful bows to enhance hairstyles. Whether for casual wear or special occasions‚ ribbon hair bows remain a timeless and versatile accessory. Experiment with different styles‚ colors‚ and embellishments to create unique looks that reflect your personality. Give it a try and enjoy the satisfaction of handmade charm!
Ribbon hair bows have become a popular and stylish accessory‚ offering a touch of elegance or playfulness to any hairstyle. Perfect for both kids and adults‚ they are versatile and easy to customize. With a variety of materials and techniques available‚ creating these bows at home is a fun and rewarding DIY project. Whether you’re aiming for a subtle accent or a bold statement‚ ribbon hair bows are a great way to express your creativity and stay on-trend. Get inspired and start crafting your own unique designs today!
Materials Needed
To create a ribbon hair bow‚ you’ll need high-quality ribbon (satin or grosgrain work well)‚ scissors‚ a hot glue gun‚ and a hair clip or band for attachment. Optional tools include a bow maker‚ dowels‚ and floral wire for shaping. Choose ribbon lengths based on the bow size you desire‚ typically ranging from 15 to 45 cm. Additional materials like thread or white glue can be useful for securing details. Ensure all supplies are ready to streamline the crafting process.
Step-by-Step Instructions
Fold the ribbon‚ create loops‚ and secure the center; Use a hot glue gun or stitch to hold the bow together. Shape and attach to a hair clip or band for a polished finish.
Start by cutting your ribbon into the desired lengths. For a standard bow‚ you’ll need one longer piece for the bow loops and shorter pieces for the center and tails. Ensure the ribbon is smooth and wrinkle-free‚ as this enhances the final appearance. Wired ribbon is ideal as it holds its shape well‚ while satin ribbon offers a sleek finish. Once cut‚ lay the ribbon flat to maintain its texture and prevent tangles or creases during the bow-making process.
To create the bow loops‚ fold the ribbon into equal sections‚ forming loops that will shape the bow. Hold the loops together‚ ensuring they are even and symmetrical. For a fuller bow‚ increase the number of loops or the ribbon length. Secure the loops temporarily with a small clip or pin. This step is crucial as it determines the bow’s size and texture‚ making it essential to maintain consistency for a professional finish.
Once the loops are formed‚ securing the bow is essential for durability. Use a hot glue gun to attach the bow to a hair clip‚ elastic band‚ or headband. For a sewn finish‚ stitch the center of the bow to the desired base. Alternatively‚ wrap the ribbon tightly around the center and tuck the ends under the loops. Proper securing ensures the bow stays in place‚ maintaining its shape and appearance. This step is vital for a polished‚ long-lasting result.

Styling Ideas
Ribbon hair bows offer endless styling possibilities‚ from subtle accents to bold statements. Pair oversized bows with sleek ponytails for a dramatic look or opt for smaller bows to add a delicate touch to braids. Choose ribbons in seasonal colors to match holidays or personal preferences. Attach bows to headbands‚ clips‚ or elastic bands for versatility. They can also be layered or combined with flowers for a unique aesthetic. This accessory effortlessly elevates any hairstyle‚ making it perfect for both casual and special occasions.
Tools Required
To craft ribbon hair bows‚ essential tools include a bow maker‚ wooden dowels‚ and a hot glue gun for secure bonding. Scissors are needed for precise ribbon cutting‚ while a measuring tape ensures accurate lengths. A needle and thread can be used for stitching‚ and a hair clip or elastic band is necessary for attaching the bow. Optional items like floral wire or a bow template can enhance creativity and precision‚ helping to achieve a polished finish.
Customizing
Customize your ribbon hair bow by experimenting with colors‚ sizes‚ and patterns. Use satin‚ grosgrain‚ or wired ribbons for different textures. Add embellishments like beads‚ sequins‚ or rhinestones for a glamorous touch. Layer ribbons of varying widths for depth or mix patterns for a unique look. Personalize the bow to match outfits or occasions‚ ensuring it reflects individual style. For a polished finish‚ secure decorations with hot glue and attach the bow to a hair clip or band for versatility.
Troubleshooting
Common issues when making ribbon hair bows include uneven loops or a messy appearance. To fix this‚ ensure even ribbon distribution and tighten loops securely. If the bow doesn’t hold its shape‚ try using wired ribbon for better structure. For frayed ends‚ apply fabric sealant or singe edges with a lighter. If loops come undone‚ dab hot glue between layers. Avoid over-tightening‚ as it can distort the bow. Practice makes perfect‚ so don’t be discouraged by initial imperfections.
Popular Trends
Currently‚ oversized bows and vibrant colors dominate the ribbon hair bow scene‚ offering bold statements. Twisted loop bows and layered designs add texture and depth‚ while subtle pastel shades provide a minimalist look. Mixing materials‚ like satin and grosgrain‚ creates unique effects. Celebrities and influencers often sport dual bows‚ inspiring fans. DIY tutorials emphasize customization‚ allowing individuals to match bows to outfits. These trends highlight the versatility of ribbon hair bows‚ catering to diverse styles and preferences‚ from casual to formal wear.
Ribbon hair bows are a delightful accessory that combines creativity with versatility. Whether for casual wear‚ special occasions‚ or as a fashion statement‚ they offer endless possibilities. With easy-to-follow tutorials and customizable options‚ anyone can create their own unique designs. Current trends highlight bold styles‚ layered textures‚ and vibrant colors‚ making ribbon hair bows a must-try DIY project. They are perfect for all ages and hairstyles‚ ensuring a timeless appeal that continues to evolve with fashion trends.